Samba, in its simplest form, is a program for Linux, FreeBSD, Windows (via WSL), etc. that enables you to share storage attached to a server with any other device in the network. It uses the SMB protocol, originally a proprietary protocol designed by Microsoft for sharing files between a Windows server and workstation. Nowadays, SMB is the standard protocol regardless of operating system.
macOS’s amazing Time Machine feature can make backups either to a local drive (whether connected externally or internally), or to a network share. Unfortunately, the way Apple has implemented it, not just any network share can be used — the server has to mark it as a Time Machine-capable share.
The Samba project recently merged the support necessary for macOS to “see” an SMB shared folder as capable of being a network Time Machine share. That’s the good news. The bad news is that your favorite Linux distro probably doesn’t have this version (4.8.0) and likely won’t until the distro’s next major release.
Until that time, you’ll need to build Samba from source. Skip past this section if your distro already comes with Samba 4.8.0 or newer. Ubuntu 18.10 and Debian Buster do have 4.8.x.
Start by downloading the latest version of the Samba source.
mkdir ~/build
cd ~/build
wget --content-disposition https://github.com/samba-team/samba/archive/samba-4.9.2.tar.gz
tar -xf samba-samba-*.tar.gz
cd samba-samba-*/
Before we build, install the build dependencies, and (if needed) uninstall the currently installed copy of Samba. This, of course, varies based on the package manager your distro uses. Here is how it would be done with Debian or Ubuntu:
sudo apt remove samba
sudo apt autoremove  # (clear out the now-unused Samba dependencies)
sudo apt install build-essential avahi-daemon tracker libtracker-sparql-1.0-dev
sudo apt build-dep samba
The Samba wiki has instructions for other distros.
Now we can build and install:
DEB_HOST_MULTIARCH=$(dpkg-architecture -qDEB_HOST_MULTIARCH)

./configure \
    --prefix=/usr --exec-prefix=/usr --sysconfdir=/etc \
    --localstatedir=/var --libdir=/usr/lib/$DEB_HOST_MULTIARCH \
    --with-privatedir=/var/lib/samba/private \
    --with-smbpasswd-file=/etc/samba/smbpasswd \
    --enable-fhs --enable-spotlight --with-systemd

make -j$(nproc)
sudo make install

sudo cp bin/default/packaging/systemd/*.service /lib/systemd/system
sudo systemctl daemon-reload
sudo systemctl enable {nmb,smb,winbind}.service
sudo systemctl start {nmb,smb,winbind}.service
Again, this is pretty specific to Debian/Ubuntu. $DEB_HOST_MULTIARCH is, for instance, x86_64-linux-gnu on a 64-bit PC, or aarch64-linux-gnu on a Raspberry Pi 3. If you’re not on a systemd-based distro, remove --with-systemd, and replace the last few systemd-related lines with calls to the init scripts:
for i in nmb smb winbind; do sudo /etc/init.d/$i start; done
Newer distros (at least the case with Ubuntu 17.10) may have libtracker-sparql version 2 rather than 1. It doesn’t seem Samba’s Spotlight feature supports version 2 yet, so just remove --enable-spotlight in this case.
Hopefully, you’ll now have your own copy of Samba built and running. Disconnect and reconnect to your shares on your Mac to double-check that it’s working fine.
You’ll need to do some additional work to set up Tracker, the search backend. (I really wish this part were much easier.)
A Time Machine share is for the most part no different from any other share. The five parts required to enable Time Machine support are:
- The
fruitmodule, which provides Apple’s proprietary extensions to SMB, - The
catiamodule, which maps the encoding of filenames that macOS expects to a form most native Linux filesystems can support, - The
streams_xattrmodule, which maps macOS’s extended attributes to a separate AppleDouble file, - Optionally, the
spotlightmodule, which builds a Spotlight search index on the server to speed up discovery of files in the backup, and - Avahi, a multicast (aka Bonjour) daemon for Linux, used here to allow Macs on the network to discover the Time Machine share.
Importantly, Avahi support is intentionally disabled in Debian and Ubuntu’s builds of Samba, and Spotlight support is not enabled. These are both features you can live without; you can manually configure Avahi to advertise the services, and a Spotlight index is recommended but entirely optional. Since we’re building from source here, we’ll just pick the easier option of having them both enabled for us.
Edit /etc/samba/smb.conf (this assumes you already have one or understand how to create one), and fill in the details for your Time Machine share:
[timemachine]
    comment = Time Machine
    path = /data/backup/timemachine
    browseable = yes
    writeable = yes
    create mask = 0600
    directory mask = 0700
    spotlight = yes
    vfs objects = catia fruit streams_xattr
    fruit:aapl = yes
    fruit:time machine = yes
What this does:
- Defines a share called
timemachine, - Sets its location on the server to
/data/backup/timemachine(you should change this to suit your setup), - Enables authorised users to read and write to it,
- Sets tight file and directory permissions so only the original owner can access their own files,
- Enables Spotlight indexing on the share,
- Enables the VFS modules that were discussed above, and
- Enables the Apple extensions, and instructs
fruitto set the Time Machine flag on the share.
Save this, and create the directory you specified. After restarting smbd as per usual (sudo systemctl smb restart or sudo /etc/init.d/smb restart), open Finder on a Mac. As long as no firewall is blocking it, in the Shared section of the sidebar, you’ll see your server’s hostname.
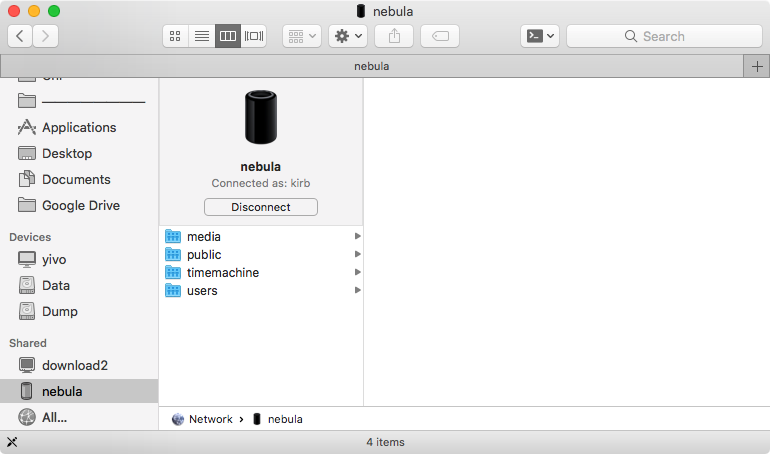
This is one part of the Avahi functionality — any device that supports multicast discovery (mostly Macs, but other devices can too) will now discover the server while performing a search for SMB services on the network. The second part is the ability for the Time Machine preferences pane to list it as an available destination for backing up to.
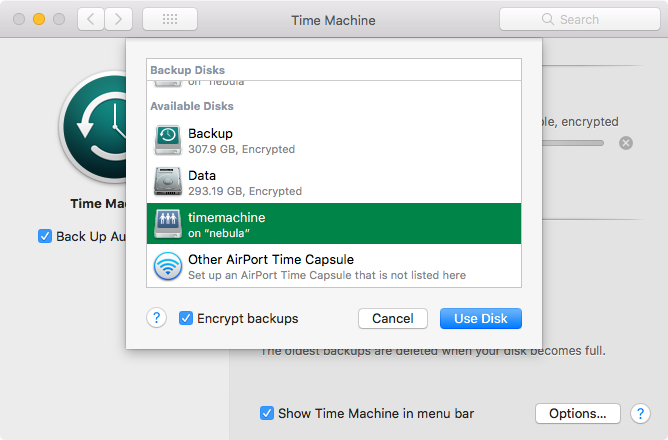
In the Time Machine pane of System Preferences, click “Select Disk…”. The share will appear. Select it, enter your password, and it’ll instantly begin making an initial backup to it.
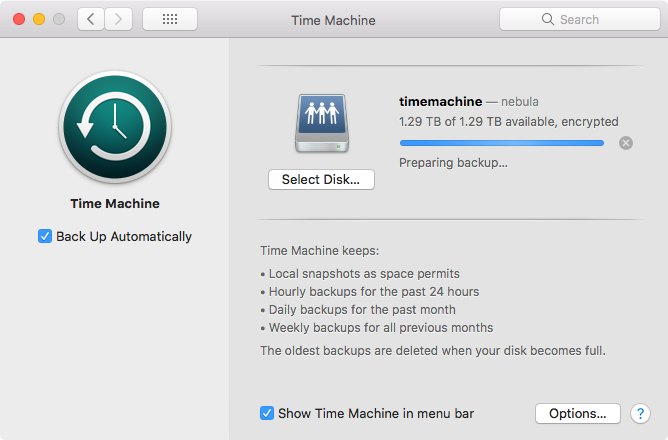
Perfect!
If the share doesn’t appear due to a firewall blocking multicast packets, or because the server is external to your network, you can force it to be used anyway by running the following in Terminal on the Mac:
tmutil setdestination 'smb://kirb:mypassw0rd@myserver/timemachine'
This will force Time Machine to connect to the specified server hostname or IP, using the specified username (kirb) and password (mypassw0rd), and back up to the specified share. The share still needs to have the Apple extensions enabled.
Using this method, you could store your Time Machine backup offsite on a server located in a datacenter or colocation service. (Personally, I prefer this job to be handled by Backblaze1, alongside Time Machine for local backup.)
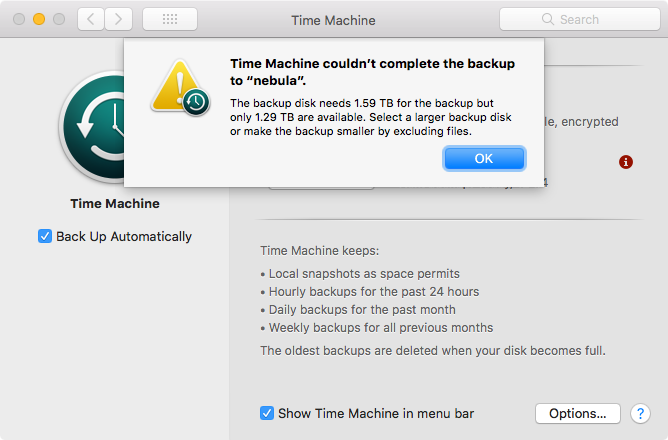
I’ve been running this for a few days and so far the only trouble I’ve had is that Time Machine will compare the size of the backup to the available space reported by the server, but as you can see in the above screenshot, ZFS indicates far less than the actual capacity I have available (4 TB). The only workaround I’ve found is to make a first backup with some larger directories excluded, which will make ZFS eventually indicate more space is available. Then, remove those exclusions, and on the next backup it will work fine.
To make the most of your available space, you might consider enabling compression at the filesystem level. ZFS supports this. I created my backup volume like so:
sudo zfs create meteor/backup -o mountpoint=/data/backup -o compression=on -o quota=2T
This mounts the volume at /data/backup, enables compression, and ensures this volume can’t grow larger than 2 TB (so that the other 2 TB remains available for my own storage). This, of course, expects your server to have a reasonably fast CPU with a reasonable number of cores so your backups and restores don’t become extremely slow while the server produces large amounts of heat. Any Core i3/i5/i7 server is probably perfectly fine, but decide for yourself what you’re comfortable with.
By the way, if you have a Mac running macOS High Sierra or newer that you use as a server, you can now create a Time Machine share directly from the Sharing preferences pane, rather than having to buy and install macOS Server:
ProTip®: you can make any mac a time machine server without buying macOS server. create a backups share, then right click → advanced options pic.twitter.com/W2SKcjKQrt
— Adam Demasi (@hbkirb) October 26, 2017
-
Affiliate link, but surely you won’t mind me gaining $5 in credit for the hours I spent researching and writing this article? ↩